Our branched install component for the docs site allows our users to select one or more options, which then displays content based on those choices.
Overview of creation process
Before you start working with the branch install component, some things to consider:
- Ensure you definitely want to use the branched install. Consider if your problem can be solved with another solution (for example, the tab component).
- Browse the branched install docs we've made and see what's possible. Select one you'd like to clone to use as a template.
- Finalize the logical flow of what your options will be and what content will be displayed. Ideally you want to be near-final in your content plans before creating a branch. For this reason, you might break the work into two or more Jiras.
You can build the branched install component in many ways, and it may take you a good amount of effort to get it working, especially the more complex your structure is. But, that said, here's a high-level view of what a creation process will often look like:
- Review the branched install docs, especially our example YAML files. Get to know the structure and logic of this component.
- When you're ready to start, copy the YAML file and associated folders of an install component you want to emulate, and use those as a basis for your project.
- Change the top-level folder name to match your project, and change the
agentNamein the YAML file to match. TheagentNameis what tells the YAML file which folder to pull its content from. (See our example YAML files.) - To make sure things are working, do a local build.
- Start adding your .mdx files and editing the yaml file. Depending on how closely your plans match the existing logic, it may be easier to strip out most of the content from the YAML file, and add in a little bit at a time.
- As you work, build frequently to test out if things are working. Doing small chunks of work and then checking if it's building will help you avoid wasted time troubleshooting. Use the YAML verify script to check for errors.
If you get stuck, ask for help from someone who's built one of these.
Important decision points
There are a few different approaches you can take with the branched install. Here are some major decision points:
Our branched install uses
Here are our implementations of the branched install with summaries of the choices made for them. We recommend picking one that matches the approach you want to take and adjust it as needed. Please try to keep this list up to date as we add new uses.
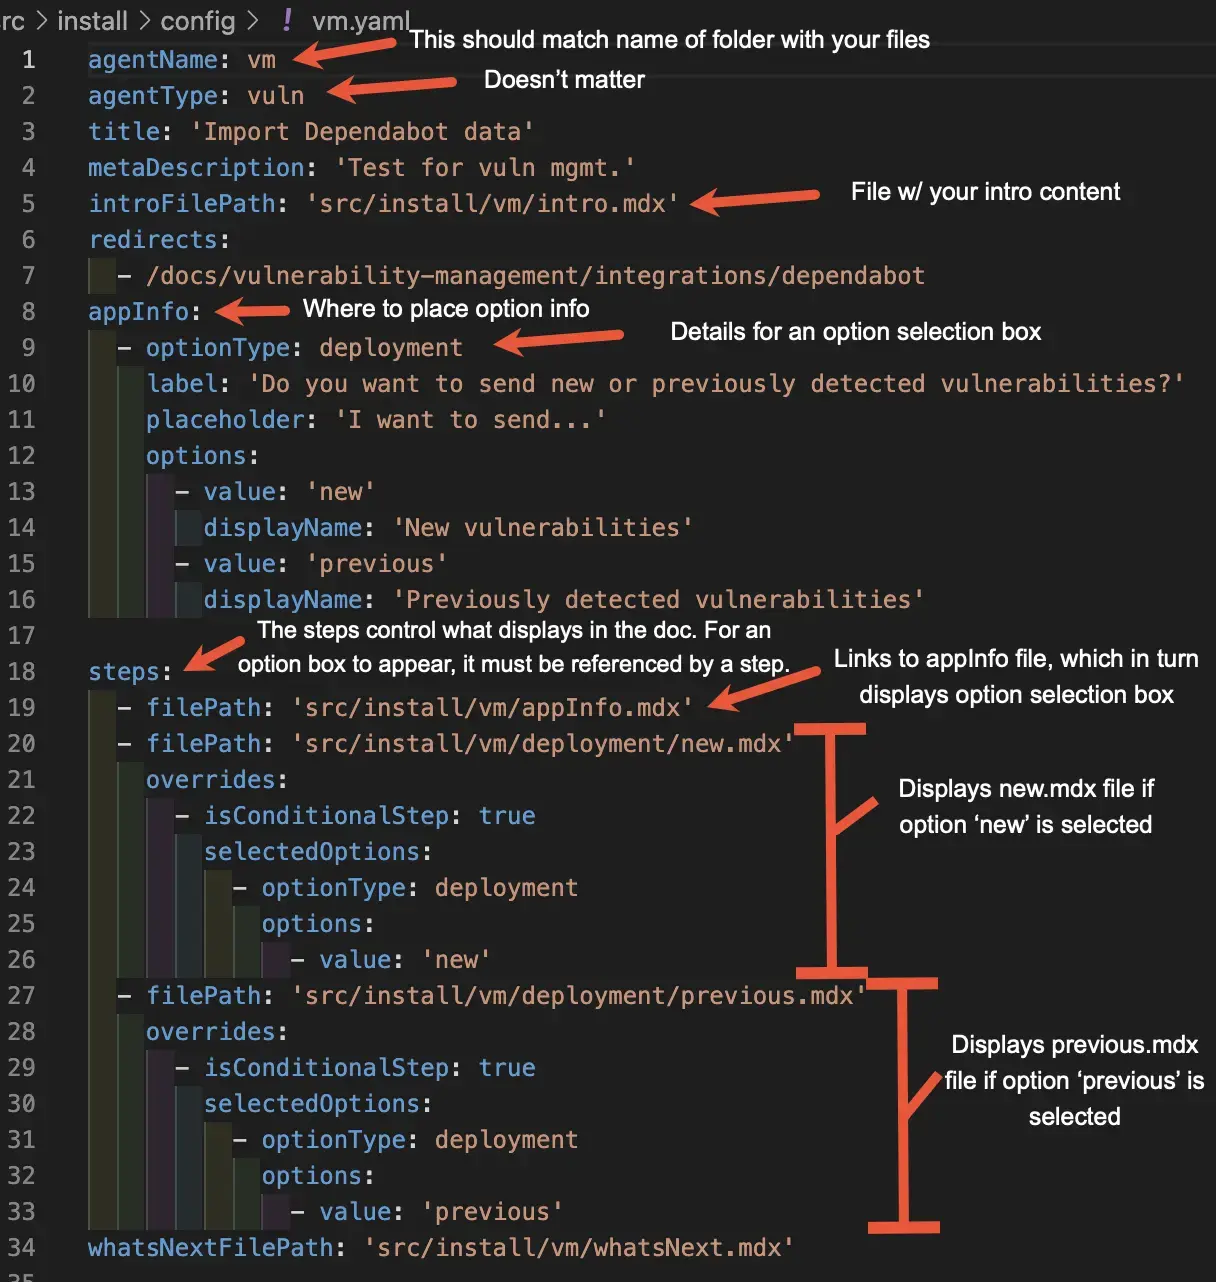
- Vulnerability management: Import dependabot data. See a labeled image of this YAML file. Details:
- A very simple implementation. A single option selection box, which lets you choose between two files.
- No default-displayed content.
- Note that this is so simple, the tab component might have been a better choice.
- MySQL integration install. Details:
- A simple implementation with only a single option selection box.
- It takes a default-content-displayed approach.
- Java install. Details:
- It takes a default-content approach. This is because there's one install path that most customers take.
- It has only two option selection sections: depending on what's selected in the first option, a second option box is displayed.
- It uses the
recommendedGuidedcomponent to display the guided install (contained in theappInfo-2file). - It uses the config file component.
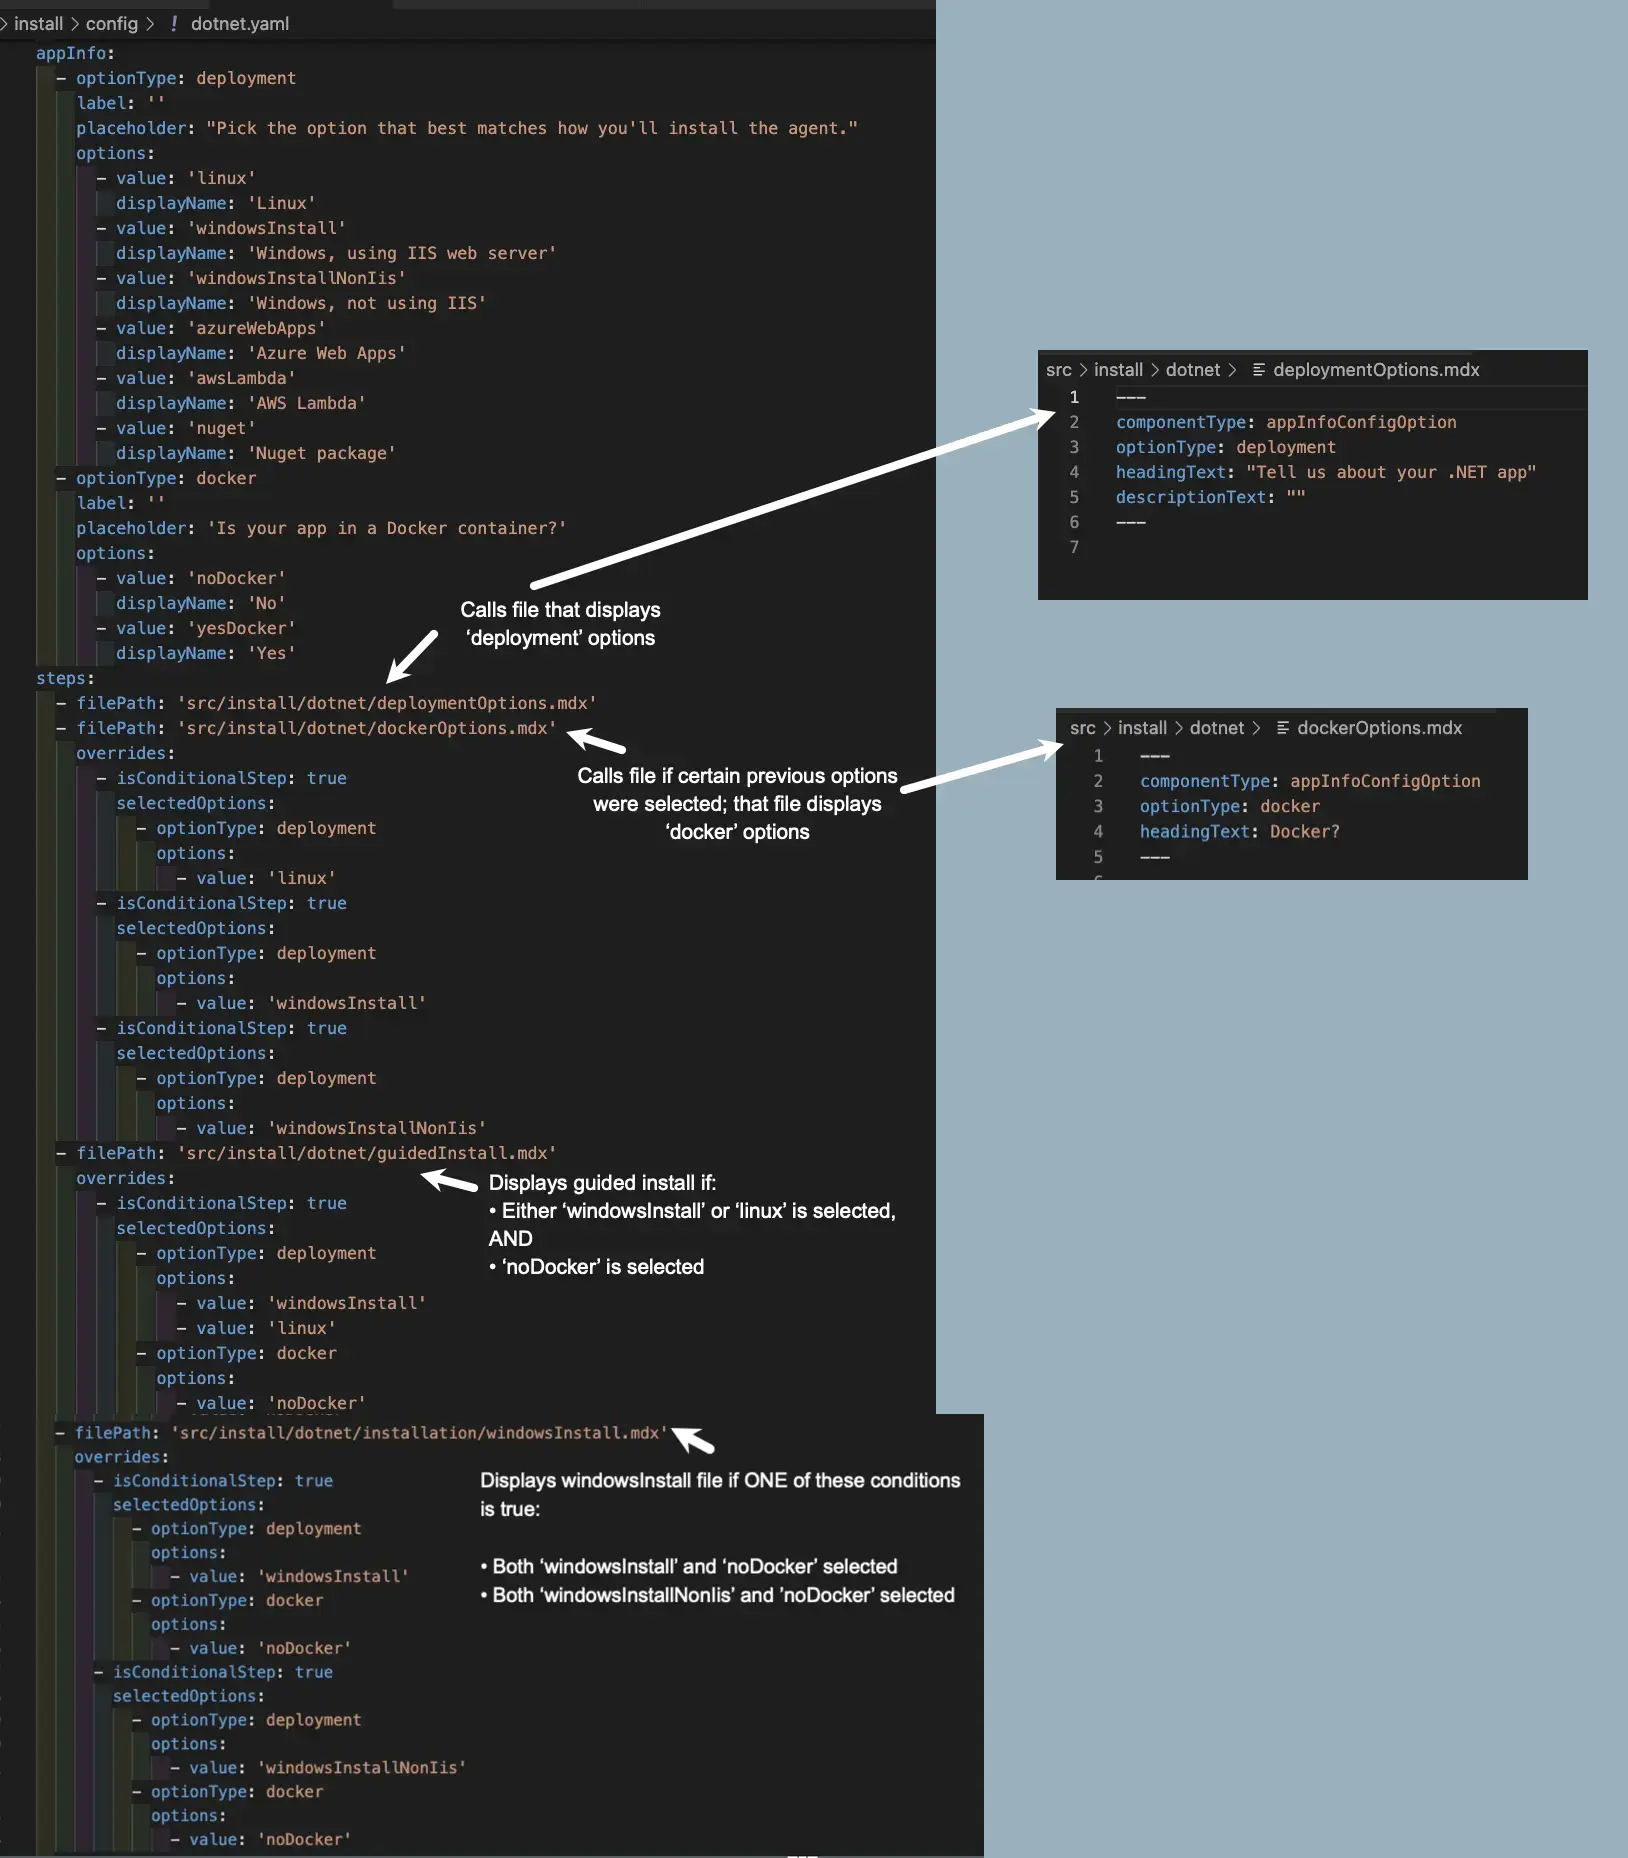
- .NET install. See a labeled image of this YAML file. Details:
- This doesn't display any default content. It relies entirely on the
isConditionalStep: trueapproach. This is because there's quite a few paths and no one path the majority of customers take (although theoretically we could have chosen one). - This has only two option selection sections: depending on what's selected in the first option, a second option box is displayed.
- It uses the
recommendedGuidedcomponent (contained in theappInfo-2file). - It does not use the config file component: this is because most customers edit the configuration via environment variables or other options and not through direct use of the file.
- This doesn't display any default content. It relies entirely on the
- Python install. Details:
- It does not display default content. It relies entirely on the
isConditionalStep: trueapproach. This is because there is no one major path. - This has quite a few option selection boxes: up to four, depending on what gets selected.
- It does not use the config file component.
- It makes use of comments, which helps understanding of the code and improved maintenance.
- It does not display default content. It relies entirely on the
- network monitoring endpoints. Details:
- A pretty simple implementation. Three option selection boxes that control which of several tables are shown. A default-displayed file with replace overrides that determine which table to show.
YAML file examples
The YAML files contain all the logic about how the branched install will work. We have two examples below.
A simple YAML file example
This is our simplest YAML file, the one for vulnerability management, with some explanatory labels.

A complex YAML file example
Below is a section of a more complex YAML file, the one for .NET install, with some explanatory labels. Things to note about this:
- Note the more complex and/or logic that's possible by using multiple options under a single
isConditionalStepclause (AND logic), or using multipleisConditionalStepclauses under a singleoverridessection (OR logic). - This puts the guided install content in an .mdx file, instead of using the
recommendedGuidedcomponent.
